Video tutorial:
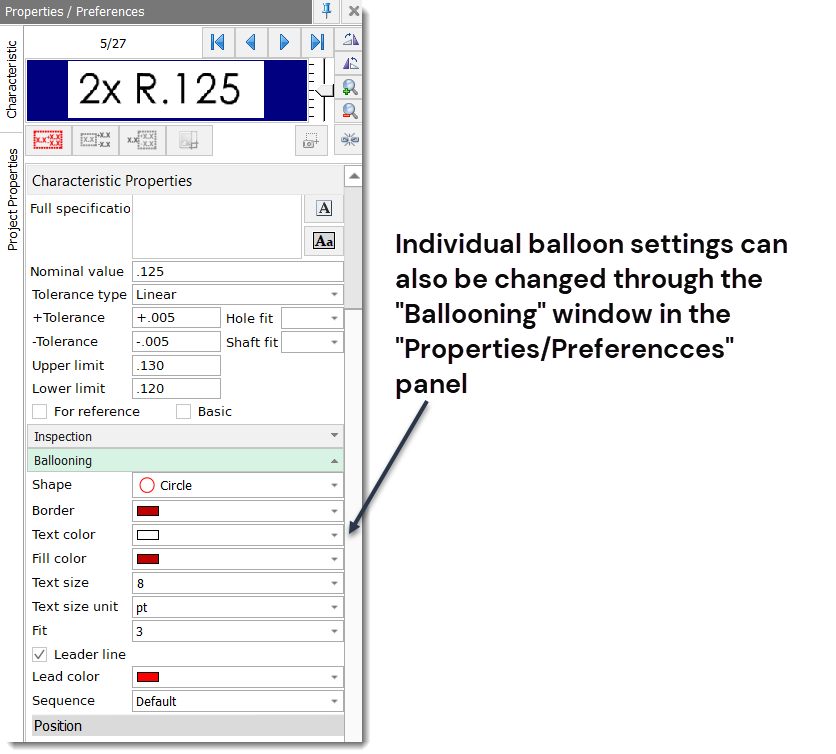
There are three ways that balloon settings or options can be modified- through the InspectionXpert "Options" window, the InspectionXpert "Balloon Appearance" toolbar, and through the "Properties / Preferences" panel:
It's recommended that you set your project balloon options such as color, text size, etc. in the "Ballooning Options" window.
To open the Options window:
- Click the "Home" tab, then select "Options".
- Or, you can select "File", then click "Options".
Note: In order to be able to open the Ballooning Options window, you will need to first have an InspectionXpert project open.
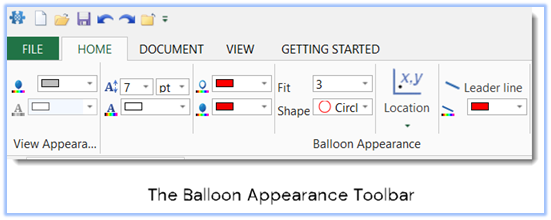
Using the Balloon Appearance toolbar:
The Balloon Appearance toolbar can be used to update the balloon settings that are currently saved in the "Balloon Options" window, but there are a few things to keep in mind when using the toolbar:
You will need to be sure that no characteristic is currently selected when you make the change, otherwise, the change will only be applied to the selected balloon:
To update all future balloons through the toolbar, "deselect" the current balloon, then make the changes in the toolbar. You'll be notified that the changes will be applied to all future balloons:
Note: Changing balloon settings or options in a project will not change any previously ballooned characteristics.
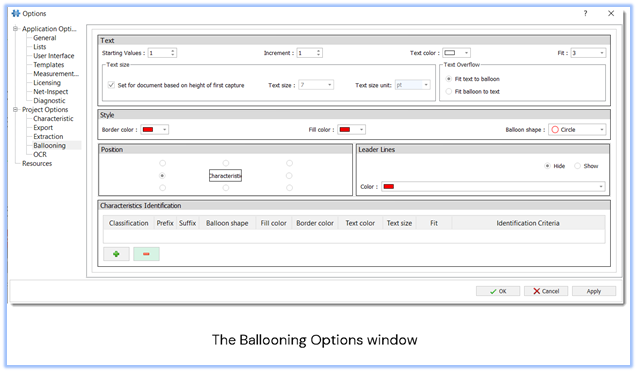
The Ballooning Options window:
Text:

| 1 | “Starting Value” is the first balloon number that will be used when you begin ballooning. |
| 2 | The ‘Increment” indicates the numerical difference between one balloon number and the next. |
| 3 | "Text Color" - The color of the text inside the balloon |
| 4 | "Fit”. The fit indicates the maximum number of digits your balloons numbers will use |
| 5 |
"Text size":
|
| 6 |
“Text Overflow” - In the event that the text exceeds the number of characters selected in the "Fit" setting:
|
Style, Position, and Leader Lines:

| 1 | "Border Color"- The border color of your balloon |
| 2 | "Fill Color" - The fill color of your balloon- Select "Transparent" to make your balloon invisible |
| 3 | "Balloon Shape" Choose from "Circle", "triangle", "Hexagon", "Diamond" or 'VDA balloon" |
| 4 | 'Position"- Select the default location of the balloon based on the location of the capture rectangle |
| 5 | "Leader Lines"- select color settings for leader lines and whether they will be visible or not |
Characteristics Identification:

The final setting in ballooning options is "Characteristics Identification". This allows you to select a pre-defined balloon type based on custom classifications.
To add a custom balloon type,
- Click the "+" to add a classification
- Choose a pre-defined classification from the drop-down, or create your own in the "Lists" section of the "Options" window:
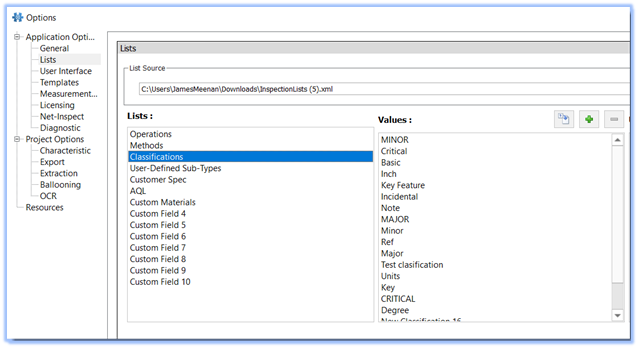
- You can add classification values manually, or import them from a saved .CSV file.
- You can then specify a balloon prefix, suffix, or both as well as shape, color, and text size settings
- Now, when you wish to use a custom balloon type, just balloon the drawing as usual, then select the classification from the menu:
To save your balloon settings for reuse in another project, see our knowledge base article Saving Your Project Settings with Project Templates