How do you upload to Net-Inspect?
Once you've completed your AS9102 first article inspection report in InspectionXpert, click the Upload to Net-Inspect button, then follow the directions to login to Net-Inspect where you can view forms 1, 2, and 3 of your FAIR.
With free access to InspectionXpert you can make sure you are able to upload your First Article to Net-Inspect risk free.
6 Steps to Uploading Your FAIR to Net-Inspect
In order to upload your First Article Inspection Report to Net-Inspect you will need a subscription to Net-Inspect and your login information.
Step 1: Create or Open Project in InspectionXpert
Open an existing InspectionXpert project or create a new project and open your PDF part drawing.
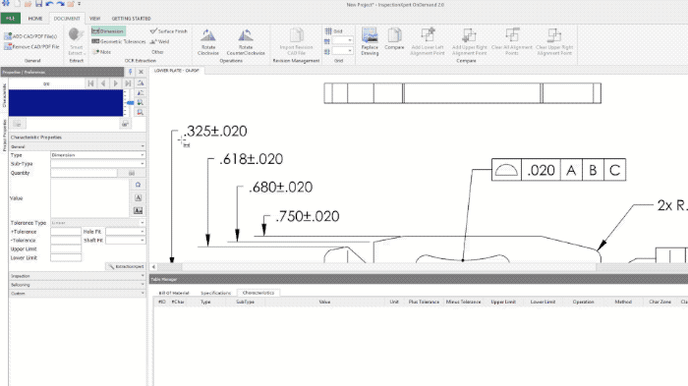
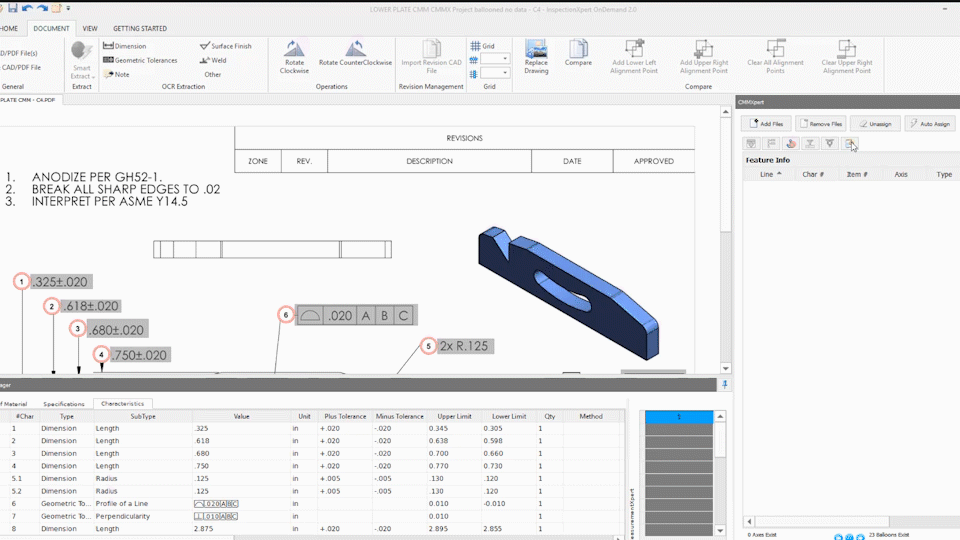
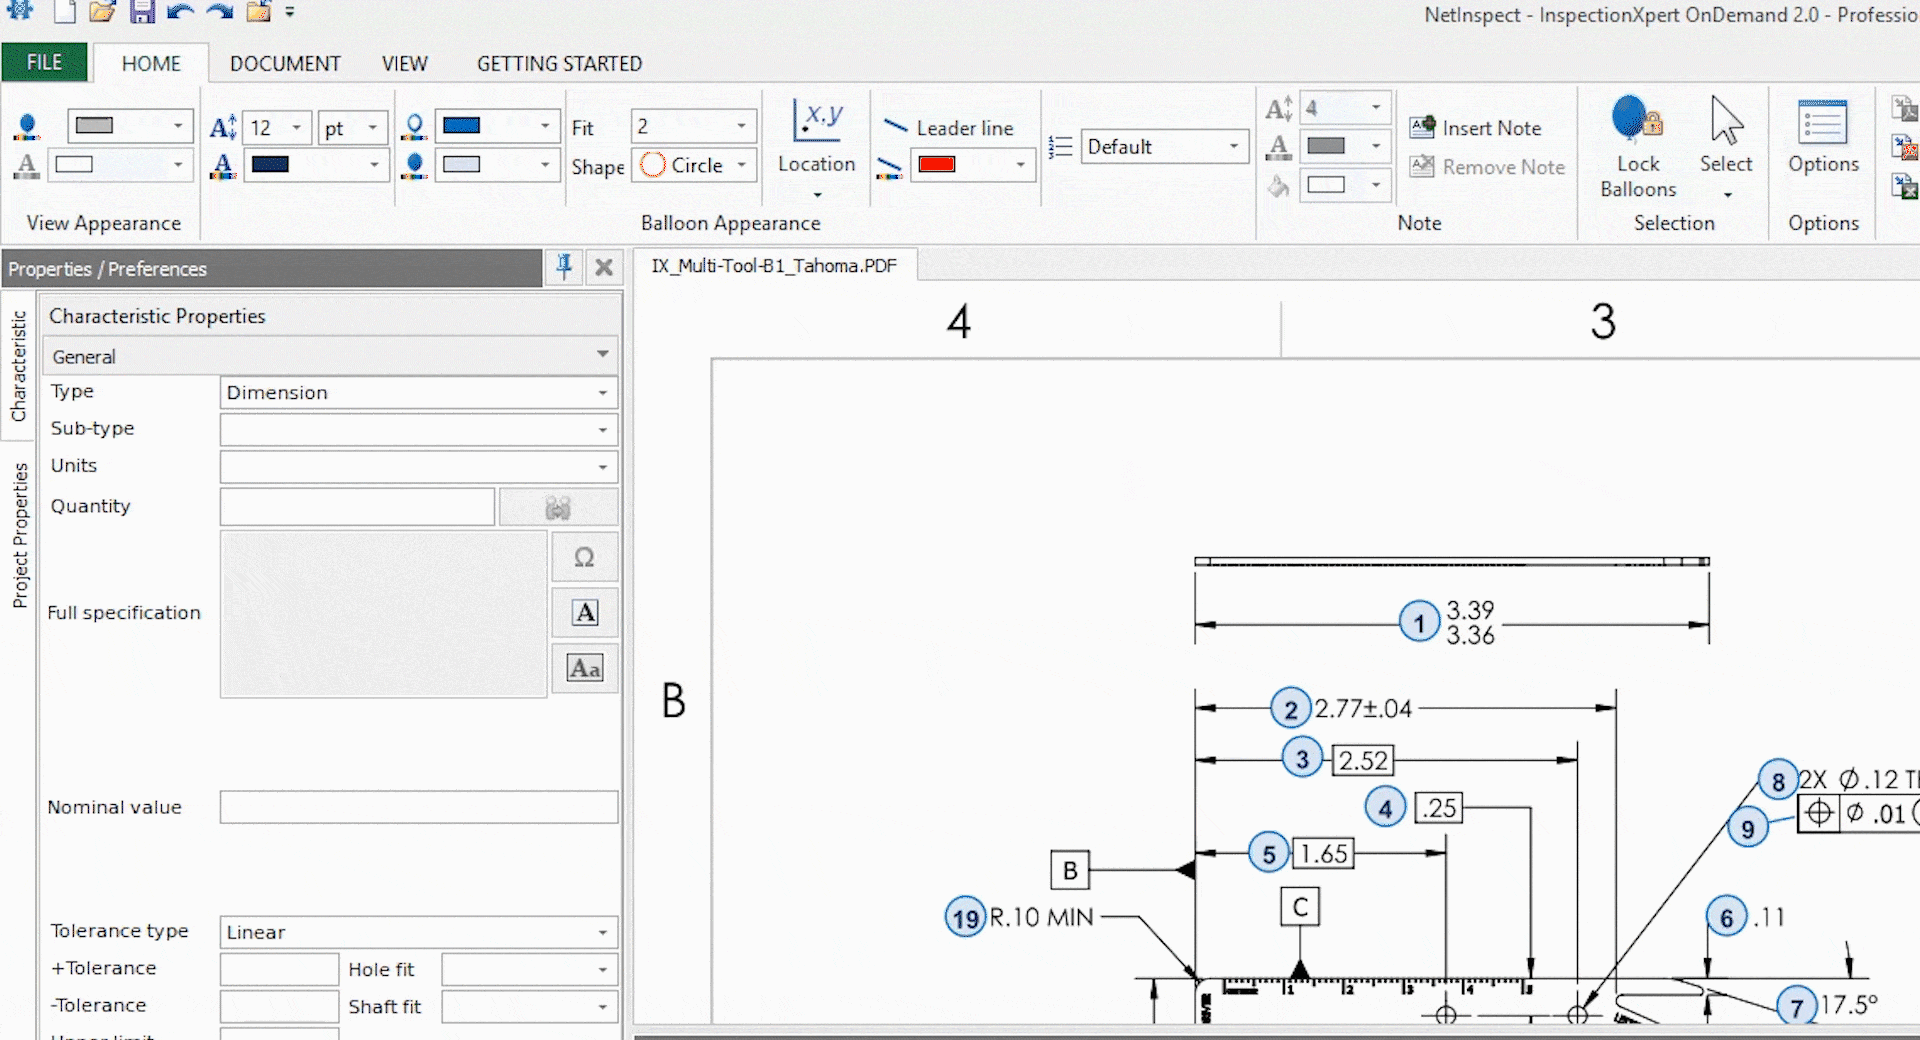
Step 2: Balloon Your Part Drawing
After opening your part drawing in InspectionXpert, balloon your drawing. InspectionXpert will balloon the characteristic while extracting the data into the table. To learn more about how to balloon your first part drawing with InspectionXpert visit the Getting Started page or watch a full-length training.
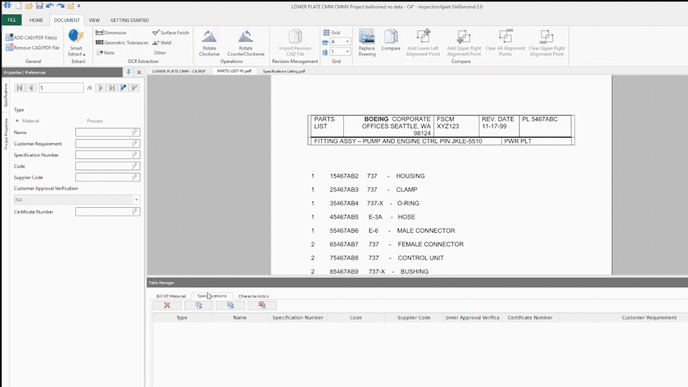
Step 3: Populate Form 1 from a Bill of Materials
Open your Bill of Materials in InspectionXpert and use the OCR (optical character recognition) to quickly extract all the data into the table. This will be included in your AS9102 report.
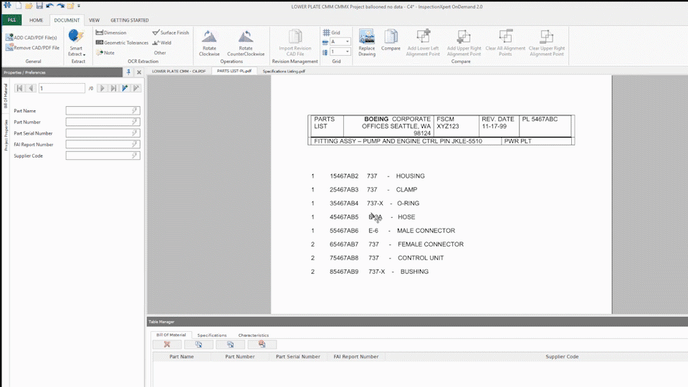
Once the data is extracted, assign the columns.
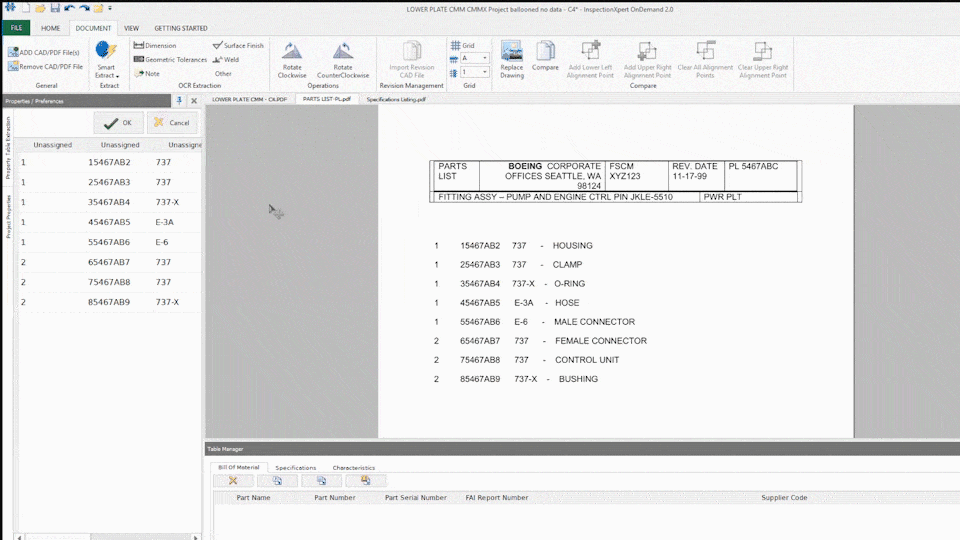
If your data comes in another format there are other options for capturing the data. You can select individual columns or rows.
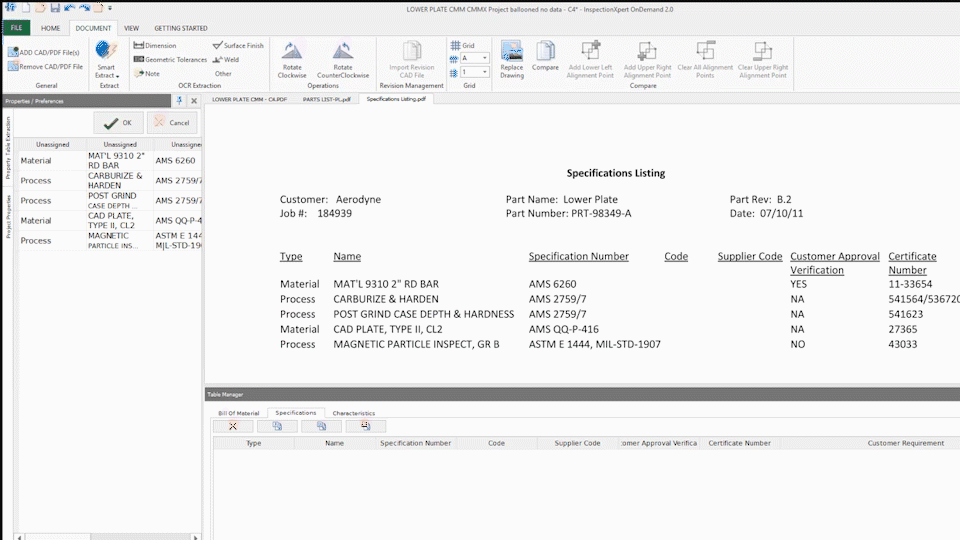
Step 4: Populate Form 2 from a Specifications List
The Specifications can be captured in the same way as the Bill of Materials. Open the Specifications tab in InspectionXpert and use the OCR (optical character recognition) to quickly extract all the data into the table.
Once the data is captured you can assign the columns.
Step 5: Import CMM data to Form 3 (Optional)
Note: If you don't use a CMM for measuring First Articles, or if you use a combination of CMM and hand tools, you can type in measurement results directly into InspectionXpert which will upload to Net-Inspect. Or if you're only using hand-tools you can publish to Net-Inspect without any measurement data and type the results directly into Net-Inspect.
Click Add File in CMMXpert, and select the template for your CMM. Then select the file, and your CMM data will load in InspectionXpert.
Your CMM programmer does not need to have access to InspectionXpert. You will just need access to the report produced by the CMM.
When programming the measurement routine in the CMM put the balloon number inside the brackets. Where this information goes will vary depending on the CMM program you use.
Once your CMM data is in InspectionXpert click Auto-Assign to match by item number. Now your measurement results are shown in InspectionXpert. If you need to create a multi-piece FAI you can import multiple CMM reports.
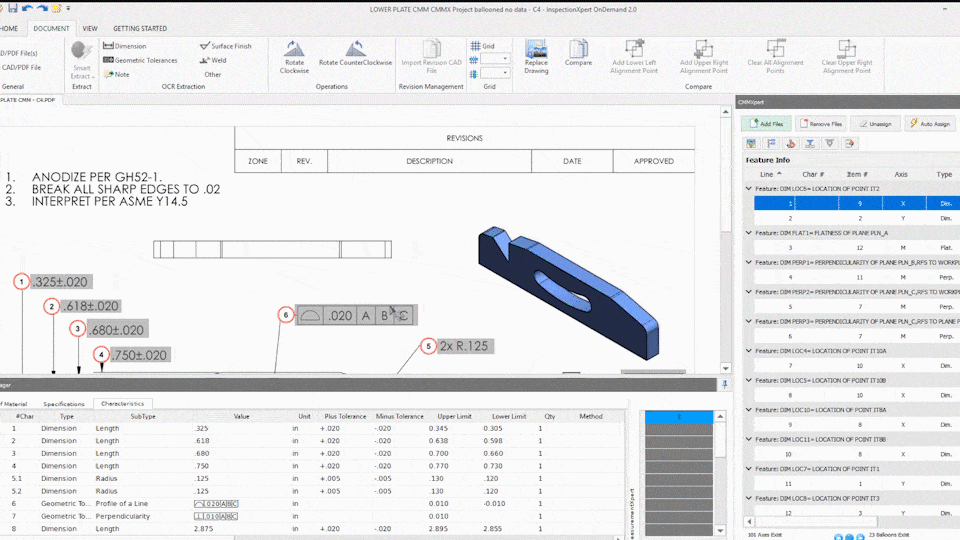
We have over 40 CMM templates available, but if you don't see yours in InspectionXpert our team can also create custom templates for your CMM.
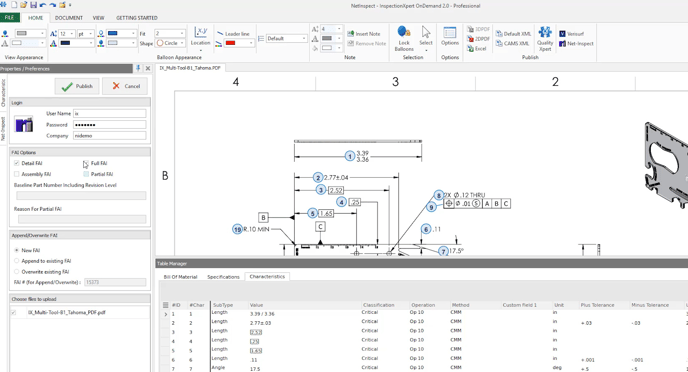
Step 6: Publish to Net-Inspect
From the File Tab go to Publish, then choose Net-Inspect.
You'll then be prompted to login to Net-Inspect. Please note, you will need an active subscription to Net-Inspect in order to view publish and view your First Article in Net-Inspect.
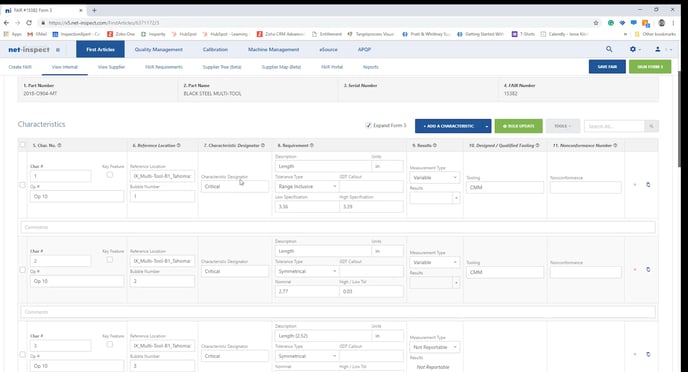
Once InspectionXpert is done uploading you'll be able to find all three forms of your AS9102 First Article Inspection Report in Net-Inspect. The part number, name, and revision level will all be automatically populated from InspectionXpert.
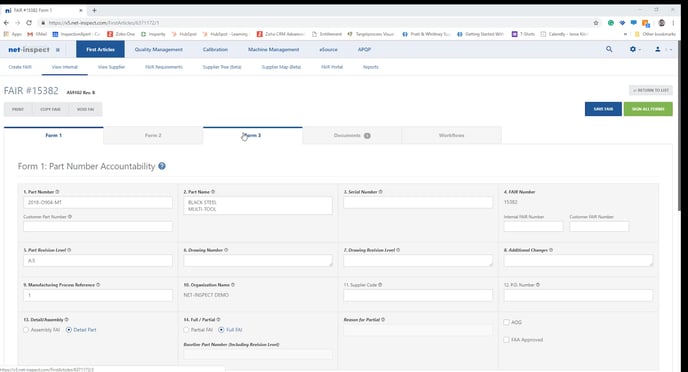
In Form 3 you'll see the reference location from the grid, characteristic number, balloon number, and characteristic designator, requirements, will all be populated from InspectionXpert.