This article will explore how to set your Grid and Zone in InspectionXpert
Video Tutorial:
16th of April, 2020Step-by-Step Guide:
1) Click the Document tab, then select the Grid icon
2) A grid will be applied to your drawing, and you'll see the grid properties panel on the left.
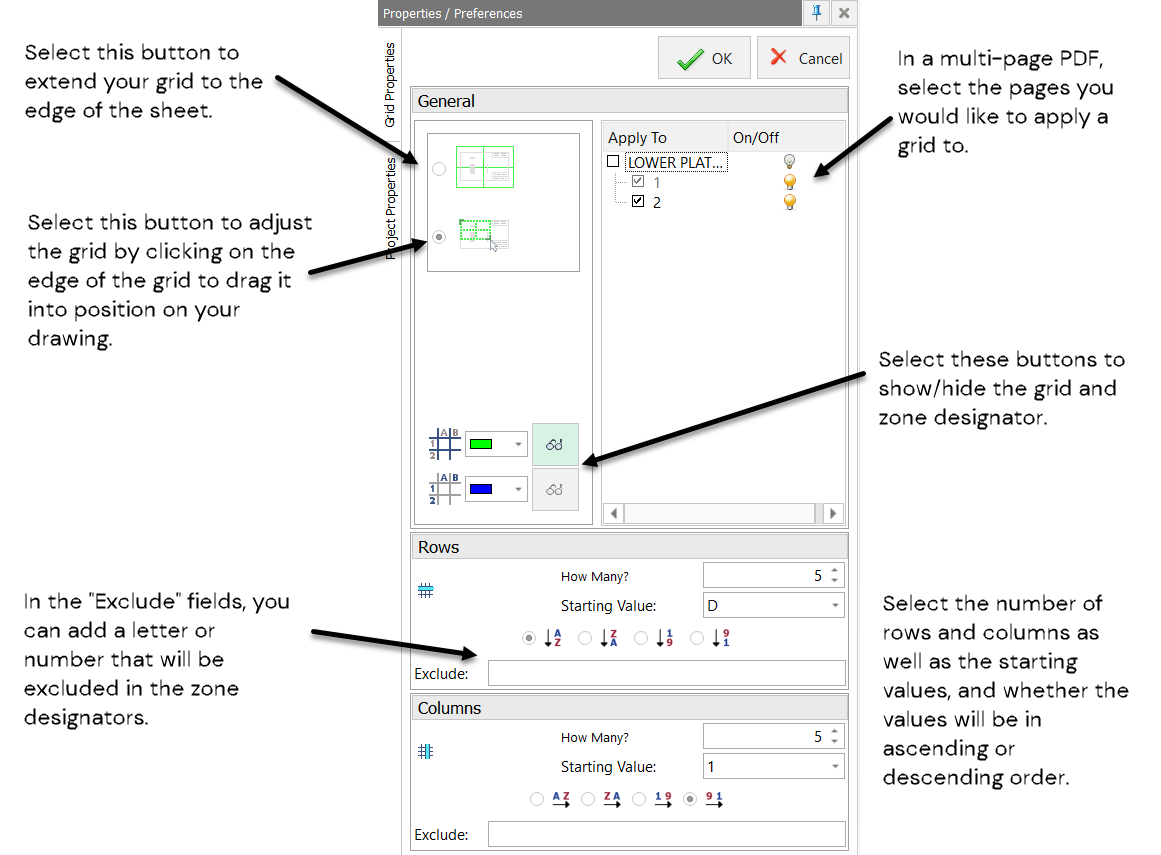
3) Here you'll find options that allow you to:
- Select the pages of a multi-page PDF you would like to apply the grid to
- Adjust the size of your grid
- Show/Hide the grid and Zone designator
-
Select the number of rows and columns, as well as the starting values, and whether the values will be in ascending or descending order.
- Be sure to select "OK" when done setting your grid

4) If you choose to hide your grid, the "Char Zone" and "Balloon Location" will still be available in your table manager, and the values can be extracted into your Excel report.

NOTE: If you perform a drawing replacement with a drawing that has more pages than your original PDF, You'll need to go back and apply those new pages to your grid using the grid settings panel:

