This article shows you how to create default and custom tolerances in your project. You can save these tolerances in an Inspection Project Template for use when creating a new part.
Video Tutorial:
Video: 2nd of March, 2020
Step-by-Step Guide:
- Click on the 'Home' tab located in the upper left-hand corner
- Select 'Options'
- Go to 'Project Options'
- Click on 'Characteristic'
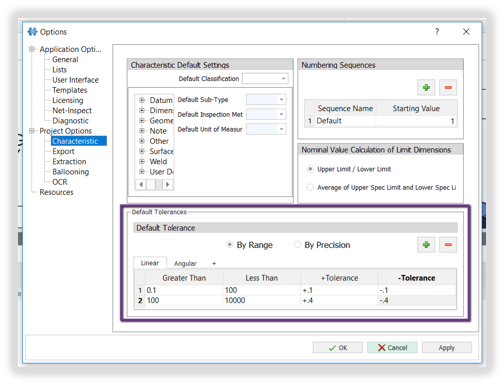
- Go to the 'Default Tolerances' section
- Click on 'Linear', 'Angular' or add a custom tolerance by clicking '+' to the right of 'Angular'
- Select 'By Range' or 'By Precision'
- By Range' will use 'Greater Than' and 'Less Than' values
- 'By Precision' will use the number of place values found after the decimal point
- Example: A precision of '0' would be X, while '1' would be X.X
- To add additional Range or Precision settings, click on the green '+' button on the right-hand side of 'Default Tolerances'
- To remove a Range or Precision option, select the row, click on the red '-' button on the right-hand side of the 'Options' window
- Click 'OK' to save your changes
- If you will need these tolerances again when ballooning new parts, save your settings as a project template:
- Click on the 'File' tab in the top left-hand corner
- Click on 'Save As'
- Click on 'Inspection Project Template'
- Name your template (Tip: include Metric or Inches in the name)
- Click on 'Save'