How to add custom fields and values to your table manager, and extract the data to your Excel report.
Video Tutorial:
Video created date: April 24th, 2020
Step by step guide:
Adding Custom Fields and values
Displaying your Custom Fields in the InspectionXpert Table Manager
Extracting Custom Values to your Excel Report
Adding Custom Fields and Values:
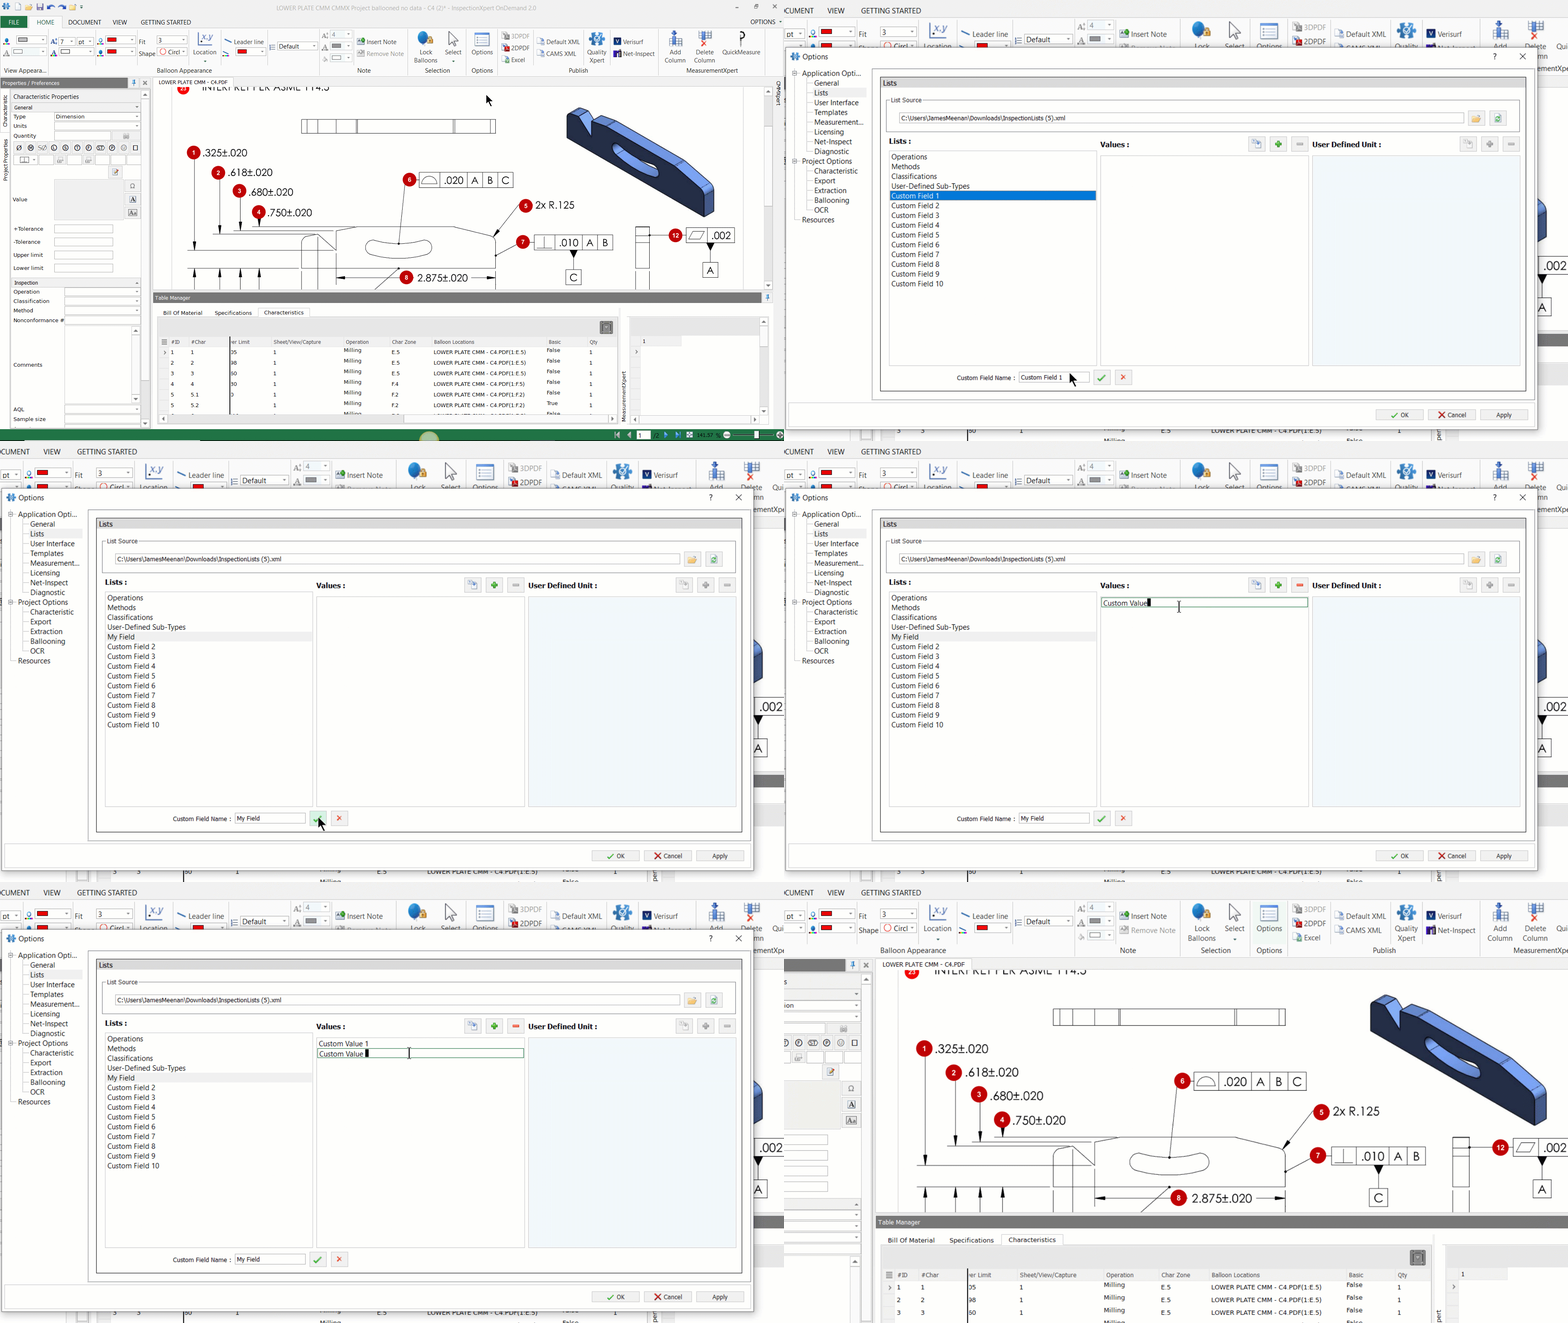
1) Open the InspectionXpert "Options" window.
2) In the Options window select "Lists".
3) Select one of the Custom Fields to modify. Change the name in the "Custom Field Name" text box at the bottom of the options window. When you're finished, click the checkmark.
4) You can add multiple custom values for your custom field. Select the custom field that you want to add values to and click the "+" button to add each custom value required.
5) You can also add custom values that have been previously saved in an Excel .CSV file format. Click the "Import" button ( Next to the "+" ) to select the .CSV file to import.
6) When you're done, be sure to click the "Apply" and "OK" buttons at the bottom of the Options window.

Displaying your Custom Fields in the InspectionXpert Table Manager
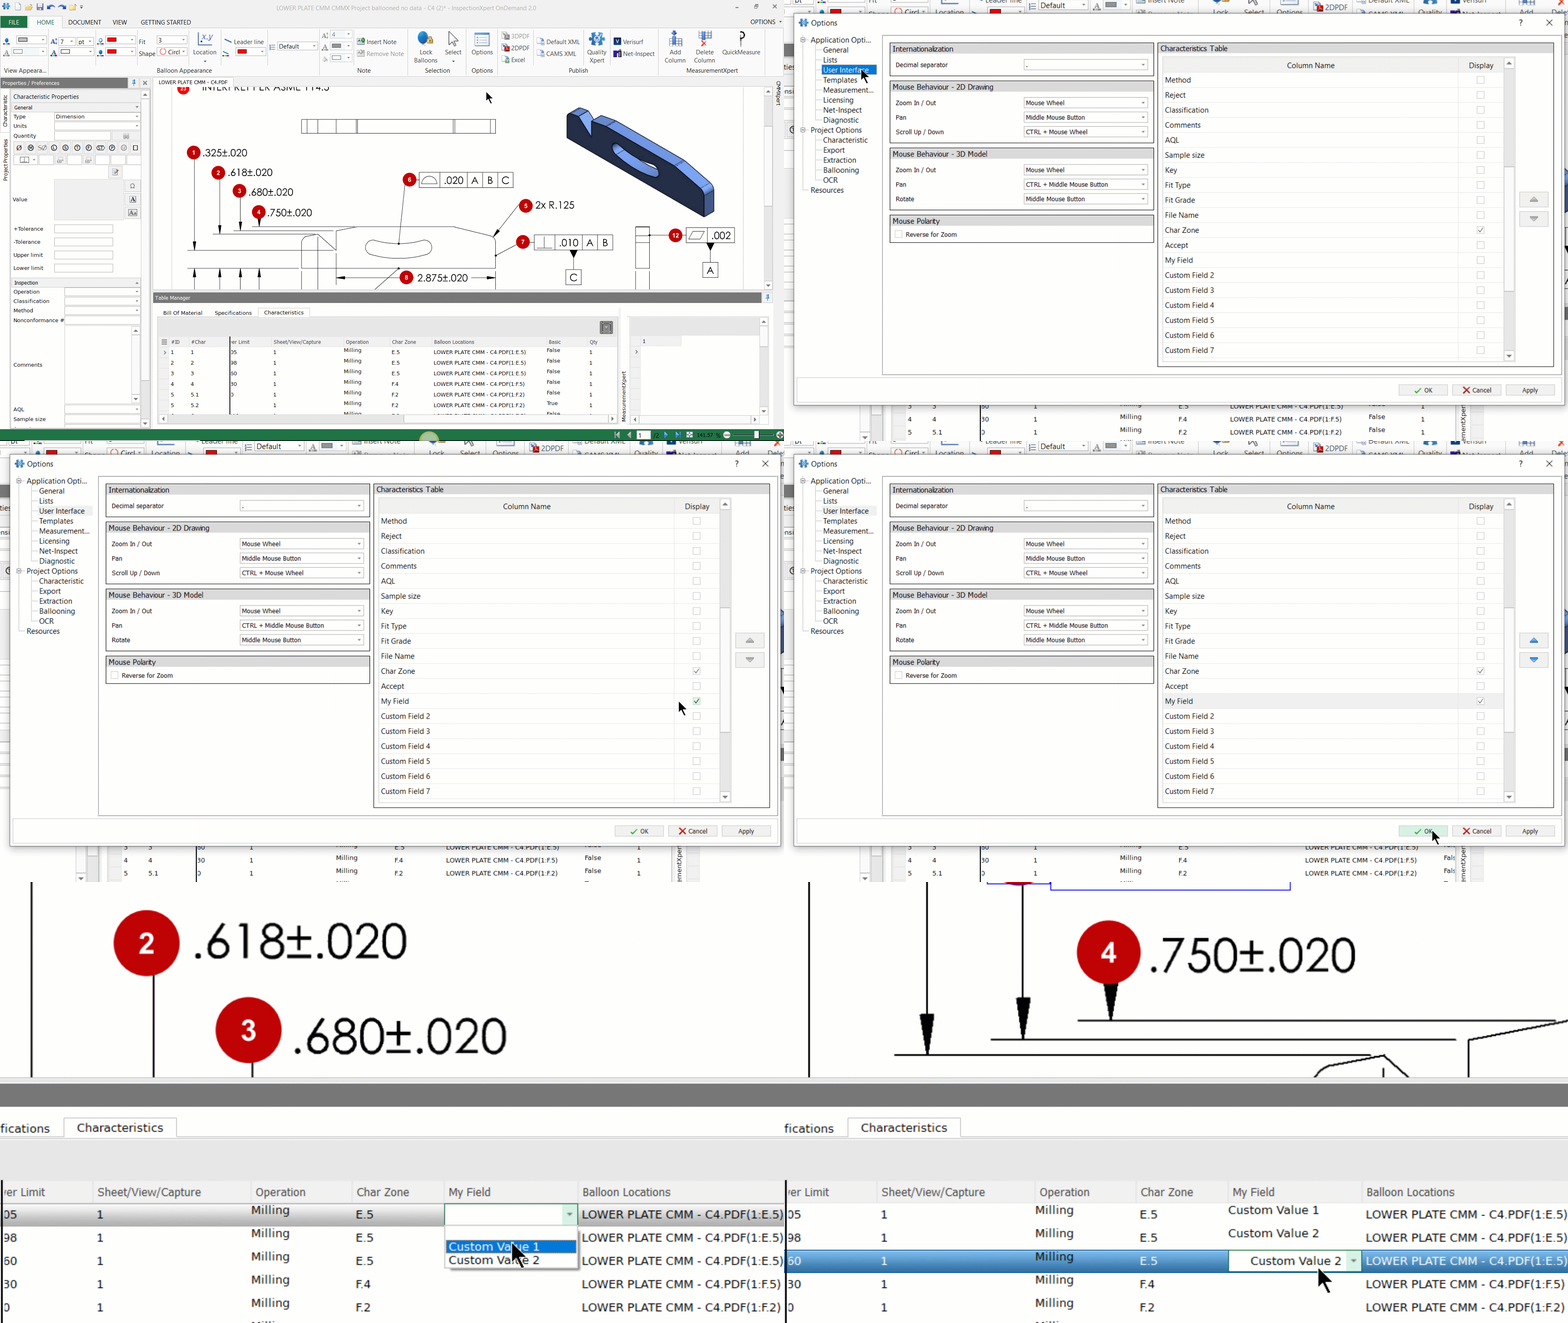
In order for your new custom field to become visible in the Table Manager, you'll need to add it to the user interface.
1) Open the InspectionXpert Options window again.
2) Select "User Interface".
3) In the "Characteristics Table" section locate your custom field and place a checkmark in the "Display" box. Be sure to click "Apply" and "OK". Your new custom field will now be visible in the InspectionXpert table manager.

Extracting Custom Values to your Excel Report
You will next need to add a token to your Excel template using the InspectionXpert template editor. This token will extract the custom values from your custom field , and publish them in your Excel report.
1) Click "File", then "Template Editor".
2) Locate and open the template file that you wish to modify.
3) In the Template Editor window, click the "Characteristic Token" drop-down , and select your custom field in the list.
4) Click into the cell that will be the first in that column, and click the "Insert" button in the Template Editor window. A token matching your custom field will appear in the cell.
5) Click "Finished" to save your template. Now when you export your project to your template, your new custom field will appear in your report, with your custom values in the appropriate cells.

