This article will show you how to use the InspectionXpert Excel template editor to create a custom Excel report template, or modify the behaviour of an existing template.
Video Tutorial:
Video: 16th of April, 2020
Step-by-Step Guide:
Building and saving your template
Adding your template to the export options list
Building and saving your template
1) If you are creating a custom template from scratch, first build your template in Excel. If you have an Excel report that you are already using, clear all the data from the report, like the measurements and part name.
2) Save your template as an "Excel 97-2003 Template" ( .XLT file) The .XLT file format is an older format ( Excel 97-2003 ) that is recognizable by the InspectionXpert template editor.
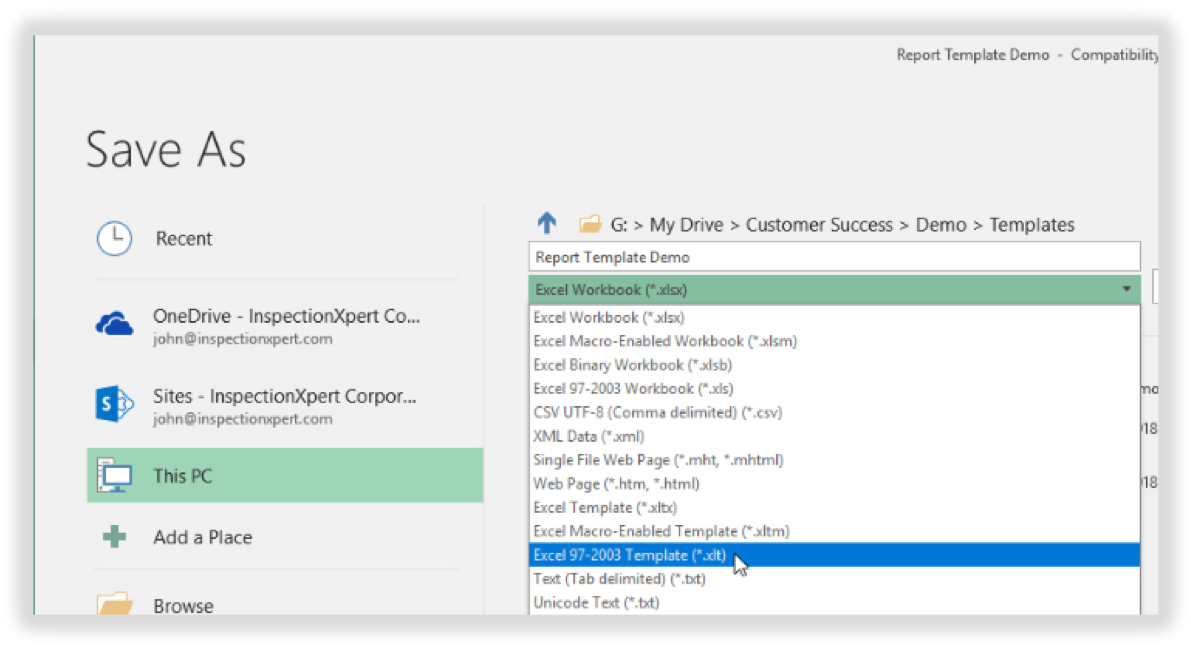
- If your existing template is saved in a newer file format such as an Excel Macro enabled template ( .XLTM) or Excel Template ( .XLTX) you will not be able to open it in the InspectionXpert template editor. We recommend re-saving it in the .XLT format
- If your template includes formatting features that are not supported in the older .XLT file format, we recommend that you create a .XLT format version of your template. You can later add the formatting that you need and resave it in the newer file format.
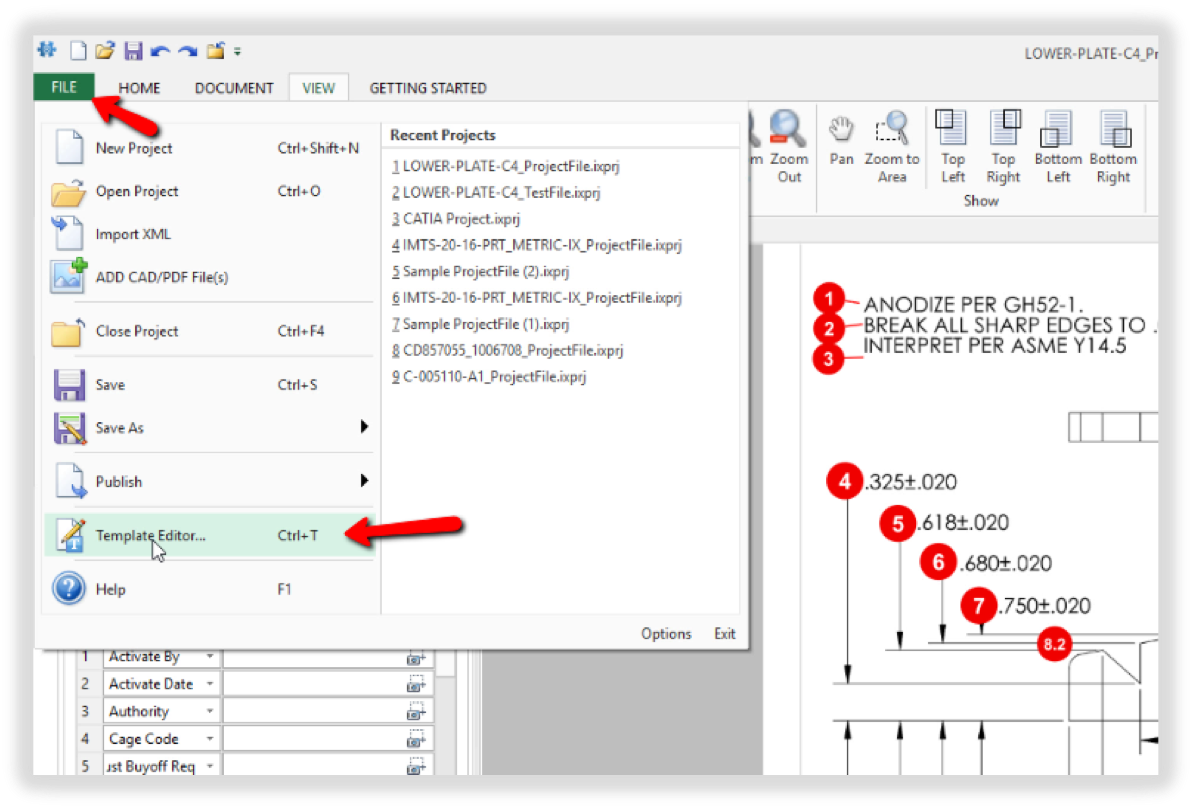
3) In InspectionXpert, click on the "File" tab and select the "Template Editor" from the menu.
4) Find the Excel template that you created and click open.
5) Your template will open in Excel, and the template editor window will also open
the Template editor window
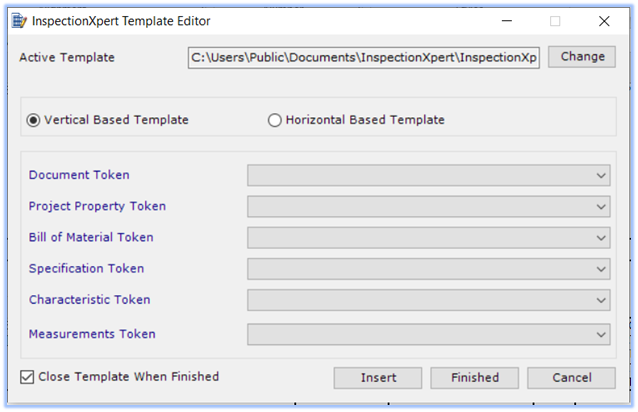
The InspectionXpert template editor supports two template formats - Vertical and Horizontal. The vertical template is the most commonly used type. Extracted characteristics will publish vertically in columns. Horizontal template characteristics will publish horizontally in rows from left to right.
Adding Tokens
The template editor uses "Tokens". Tokens are a line of code that tells InspectionXpert where to map your part data when you create your report. There are two basic types of tokens - dynamic and single value. A dynamic token will return a value for each characteristic in a project. For example, if you have 10 balloons in a project, the balloon token will return 10 different values which will be placed in your report. Single value tokens will return only one possible value. Examples of single value token include the Part Name or Part Number tokens.
1) To insert a token, first select the token from the Template Editor that you want in your report.
2) Click on the cell in the column where you want your data to populate, then click the "Insert" button:
In the case of adding dynamic tokens, you will only need to add one token in the column, and all your data will populate down from there.
3) Repeat this process until you have all the necessary tokens in place.
Adding the "IXFooterRow"
If you are creating a vertical template, you will need to add the "IXFooterRow". This will allow your report to automatically expand to match the number of characteristics in your project. If your Excel template has multiple tabs that contain fields that will need to expand based on the number of characteristics in your project, you will need to add an IXfooterRow to each tab.
To add the IXFooterRow:
1) Highlight the row below your "Dynamic" tokens by clicking on the row’s number.
2) Then go to the Formulas tab and click on “Name Manager” in the top ribbon.
3) In the “Name Manager” panel click "New" and enter the name
"IXFooterRow" then click “OK”. If you will be adding an IXFooterRow to more than one tab or sheet in your template, you will need to number them ( IxFooterRow001, IXFooterRow002 etc. ). When you’re done click "Finished" on the "Template Editor" to save your template:
Adding your template to the export options list
1) In InspectionXpert, go to the “Home” tab and click on “Excel”.
2) Click the "+" button in the export panel on the left of your screen.
3) Find the template you just finished and click “Open".
4) The template you created is now in your export list!
Exporting to your Template
1) To export all your extracted data to the report, left-click on it to highlight it,
and click 'Export" at the top of the window. In most cases, you will leave the "Publish Method" set to its default value of "Direct to File".
2) Name, and save your file. The exported report will open in Excel.
